Great ! ?Very elegant and easy ? Crochet knitted women’s vest model
I’m glad to hear you’re interested in crocheting a women’s vest! Crochet vests can be a lovely addition to your wardrobe, and there are many elegant and easy-to-follow patterns available. I’ll provide you with a basic outline for crocheting a simple women’s vest, but keep in mind that you can customize it to your liking by choosing different stitch patterns, yarn colors, and embellishments.
Materials you’ll need:
1-Worsted weight yarn in your chosen color(s)
2-Crochet hook suitable for the yarn (usually recommended on the yarn label)
3-Yarn needle for weaving in ends
4-Scissors
Instructions:
1-Gauge: Start by creating a gauge swatch to ensure your vest fits correctly. Crochet a small square using the stitch pattern you plan to use for the vest. Measure the number of stitches and rows per inch to determine your gauge.
2-Size and Measurements: Decide on the size and length of your vest. You’ll need to measure your bust and waist to determine how many stitches to start with for the foundation chain. You’ll also want to decide how long you want your vest to be.
3-Foundation Chain: Chain the number of stitches required to reach the desired width of your vest, making sure it’s a multiple of the stitch pattern you’ve chosen.
4-First Row: Depending on your stitch pattern, you can use single crochet, double crochet, or any other stitch you prefer. Start working in your chosen stitch pattern across the foundation chain.
5-Increasing for Armholes: When you reach the point where you want the armholes to start, you’ll need to create a gap for each arm. To do this, crochet a chain of the desired length (usually around 6-8 inches, depending on your size and preference), skip a corresponding number of stitches, and continue crocheting in the pattern on the other side of the chain.
6-Body: Continue crocheting in your chosen stitch pattern until your vest reaches the desired length. You can make it hip-length, waist-length, or even longer, depending on your preference.

7-Finishing: Fasten off your yarn, leaving a long tail for sewing. Fold the vest in half, aligning the sides, and use the long tail to sew the side seams together, leaving openings for the armholes.
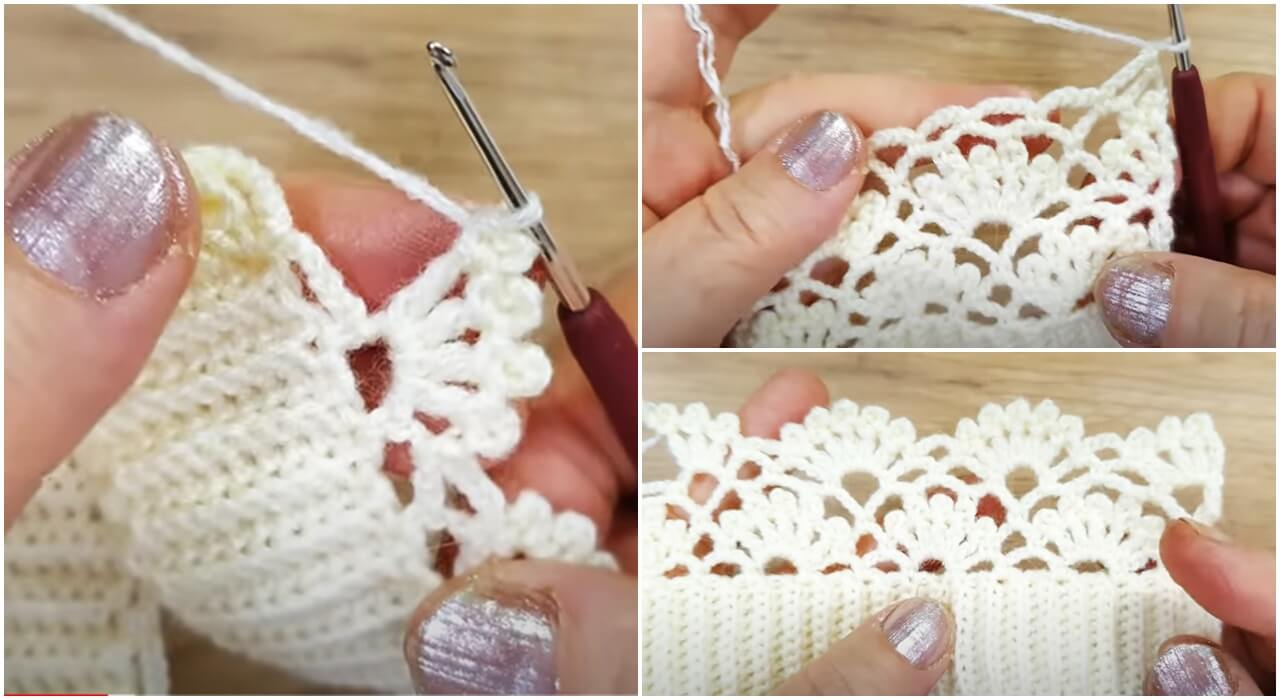
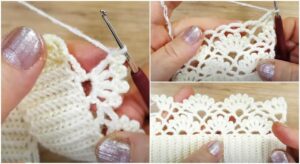
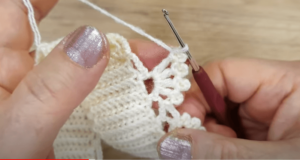
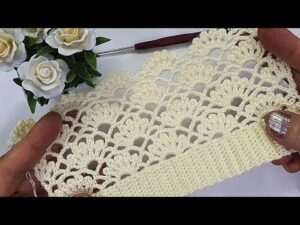
8-Edging: If desired, you can add a decorative edging around the armholes, neckline, and bottom edge of the vest. Common options include single crochet or a picot edge.
9-Final Touches: Weave in any loose ends, and your crochet vest is ready to wear!
Remember that the specific stitch pattern and design of your vest can vary greatly depending on your preferences and skill level. There are many crochet patterns available online or in crochet pattern books that can provide detailed instructions for different styles of crochet vests. Don’t hesitate to experiment and make the vest uniquely your own!
video tutorial :
Great ! Very elegant and easy Crochet knitted women’s vest model


