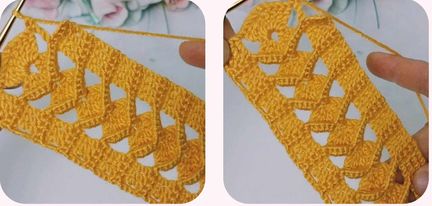
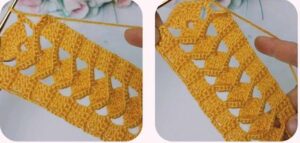
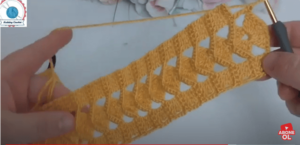
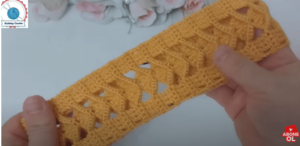
Very Easy Crochet Knitted Hair Band Making / crochet
Certainly! Making a simple crochet knitted hairband is a great beginner-friendly project. Here’s a basic pattern to help you get started:
Materials:
- Worsted weight yarn in the color of your choice
- Crochet hook appropriate for your yarn (usually recommended on the yarn label)
- Scissors
- Yarn needle

Instructions:
1. Foundation Chain:
- Start by making a slip knot and then chain enough stitches to fit around your head comfortably. A typical adult size might be around 60-70 chains, but you can adjust based on your head size.
2. Single Crochet Row:
- Single crochet in the second chain from the hook and in each chain across the row.
3. Turning Chain:
- Chain 1 and turn your work.
4. Continue Single Crochet Rows:
- Repeat the single crochet row until your work measures the desired width for your hairband. This might be around 3-4 inches, but you can adjust based on personal preference.
5. Finishing:
- Once you reach the desired width, cut the yarn, leaving a long tail for sewing. Pull the yarn through the last loop and tighten to secure.
6. Sewing:
- Fold your crochet piece in half, aligning the short ends. Use the long yarn tail and a yarn needle to sew the ends together to form a loop. Make sure to sew securely.
7. Weaving in Ends:
- Weave in any remaining yarn ends using a yarn needle to secure them and hide them within the stitches.
Optional Embellishments:
- Feel free to get creative! You can add buttons, flowers, bows, or any other embellishments to personalize your hairband.
This simple crochet pattern should give you a basic and stylish hairband. If you’re a visual learner, there are many video tutorials available online that demonstrate each step. Happy crocheting!
video tutorial :


